CUSTOMISING YOUR COLLECTION’S DESIGN
Beyond the basic options found within Settings, Uwazi offers several advanced ways to enhance the look and feel of your collection. This includes:
Adding links to the main navigation menu
Personalising the appearance of your collection by defining CSS styles
Adding custom Pages that contain information about your collection, incorporate Submission Forms or Contact Forms, or feature charts, maps and other dynamic data visualisation components
Creating a stylised display for certain types of entities
Many of these advanced options require coding and programming knowledge, and as such, you may need to seek support from a software developer. For more information, consult the Uwazi Advanced Design Guide (coming soon) or get in touch with the HURIDOCS team.
How to add pages to your collection
A basic Uwazi instance comprises the Library  , where the entities contained within your collection can be browsed and displayed in several different ways, and the Settings area, where you can configure the administrative settings of your collection. You also have the option to create additional Pages; these pages could offer background information about your collection; incorporate Submission Forms or Contact Forms so members of the public can get in touch; feature charts, maps and other data visualisation components; and more.
To add a Page:
Step 1: Navigate to the Settings area and click Pages.
Step 2: Create a new page by clicking Add Page. Add the page’s content in the space provided and click Save.
Step 3: After saving, a blue box will appear containing the Page’s unique URL. You may, for example, want to copy this URL and add it as an item on your collection’s main navigation menu.
Creating and formatting the content of a Page in Uwazi requires coding knowledge (Markdown language, HTML, CSS). For experienced developers, there is also the option of appending custom Javascript to a Page by utilising the dedicated “Page Javascript” box. We have created some custom code components for Pages in Uwazi that make it straightforward to:
incorporate a Library search bar
display a dynamic selection of entities in card format
click to view an entity’s full information, displayed in a sidebar that expands directly on the Page
incorporate a Contact Form
incorporate a Submission Form
display a dynamic counter, bar chart, pie chart or list chart that visualises a selection of your collection’s data
display a dynamic map that visualises a selection of your collection’s data
For further details, consult the Uwazi Advanced Design Guide (coming soon) or get in touch with the HURIDOCS team.
How to display entities as stylised pages
An Uwazi collection is made up of different types of entities. You can browse the entities in the Library  as cards, in a table or on a map (as long as they have an associated geolocation). If you click on an entity, you can see all of the information that it contains displayed within the right sidebar. Furthermore, by clicking the View button on an entity, you can also see the same information displayed on a full-width page that by default incorporates minimal formatting.
In Uwazi, you can replace this default full-width page view with a customised design that incorporates formatting and components of your choosing. This feature is called Entity Page View. Solid coding and programming knowledge is required to fully take advantage of Entity Page View. For details, consult the Uwazi Advanced Design Guide (coming soon) or get in touch with the HURIDOCS team.
Basic concepts
Uwazi allows you to create pages for two different purposes:
Designing your website with pages that render mostly static content with additional options to include collection-wide data analysis.
Replacing the standard Entity View with a custom page to better display and showcase data for each entity of a particular template type.
Defining a page for a particular template
The procedure to assign a page to be used as the default view of entities of a particular template is the following:
Create a Page: Settings -> Pages -> Add Page (or edit an existing page).
Give it a descriptive name and select the “Enable this page to be used as an entity view page” toggle button. This flags this page as enabled for entity view.
Edit the desired template configuration (Settings -> Templates -> Edit) and enable the “Display entity view from page” toggle.
From the dropdown, select the previously created or edited page to use as page for entity view.
Once this is done, when you enter the entity view for entities of that particular template, you will be presented with the page you just defined, instead of the traditional “metadata view” for that entity.
Designing the page
The page design follows the same guidelines described in DESIGNING YOUR WEBSITE and you can include all of the extended components described on the article to further design your page. You can also include the data visualization components described in ANALYSING & VISUALISING YOUR COLLECTION.
EntityData component
The simplest way to extract values from an Entity in a Page is with the new component <EntityData>.
This component will render the same HTML you see when you go to an Entity view. Therefore, it is already pre-processed and text fields will render as plain text, rich texts will have HTML tags to render properly, images will include an HTML <img> tag with the correct source, etc. This is a convenient way to quickly access property values and their corresponding labels (properly translated for each language).
The <EntityData> component takes one of two properties:
value-of: a string representing the name of the property of the value be renderedlabel-of: a string representing the name of the property of the label to be rendered
Take the following enttiy structure as example:
| Properties | Values | | ——————- | ———————————- | | Title | Name of a book | | Brief Description | Something nice | | Country | Ecuador | | Date of Publication | 13 July, 1977 | | Cover Image | yourdomain.com/media/bookCover.jpg |
You have access to property names and values passing the correct HTML syntax. For example, the following code:
<h1><EntityData value-of="title" /></h1>
<ul>
  <li><EntityData label-of="Brief Description" />: <EntityData value-of="Brief Description" /></li>
  <li><EntityData label-of="Country" />: <EntityData value-of="Country" /></li>
  <li><EntityData label-of="Date of Publication" />: <EntityData value-of="Date of Publication" /></li>
  <li><EntityData label-of="Cover Image" />: <EntityData value-of="cover_image" /></li>
</ul>
will output:
Name of a book
Brief Desription: Something nice
Country: Ecuador
Date of Publication: 13 July, 1977
Image:

Notice that the code would be identical for different languages if you have your content and labels properly translated, so this is a useful feature. You would still need to define the HTML for each language, but they would all be identical.
Advanced design
If the EntityData component is not verstaile enough for your needs, pay particular attention to the Query Component section of the ANALYSING & VISUALISING YOUR COLLECTION document.
The preparation steps of defining the page as “Enabled” to be used in entity view are important because they provide the data you need to display each entity’s data. With them you have access to three automatically-generated DATASETS:
entityentityRawtemplate
These new datasets can be consumed via the Value and Repeat components, just as with any other Query defined data. The entity dataset presents “formatted” entity data, where some values have presentational values or labels added to them (like dates, for example). The entityRaw dataset presents you with the unprocessed data as it is stored in the database.
To use this data, you would access the entity’s properties normally. For example, to print the Entity’s title, you would use something like:
<p><Value path="entity.title" /></p>
This, as expected, wraps the entity’s title within a paragraph tag element.
Accessing the entity’s metadata requires a little more knowledge into the way Uwazi data is structured.
entity dataset
The data has some values stored at the root level of the object, while most are stored inside the metadata object.
If EntityData is not a valid option for your needs, this is the easiest dataset to use. This data has the advantage of having some values already pre-processed for you, but not to the level of EntityData. For example, dates in Uwazi are stored using Unix time. The entity dataset provides the original value, but also a formatted value you can use that already takes into account date formats according to language, etc. It also includes the template labels correctly translated.
Take the following entity structure:
| Properties | Values | Observations | | ——————- | ———————————- | ————————————– | | Title | Name of a book | | | Brief Description | Something nice | | | Country | Ecuador | Data based on a Thesaurus of countries | | Date of Publication | 13 July, 1977 | Internally this would be: 1621618430 | | Cover Image | yourdomain.com/media/bookCover.jpg | |
Depending on the type, each property could have somewhat different structures. As an example, the above entity will look like this in the entity dataset:
{
  title: 'Name of a book',
  metadata: {
    brief_description: {
      label: "Brief Description",
      value: "Something nice"
    },
    country: {
      label: "Country",
      value: "Ecuador"
    },
    date_of_publication: {
      label: "Date of Publication",
      value: "13 July, 1977",
      timestamp: 1621618430
    },
    cover_image: {
      label: "Cover Image",
      value: "yourdomain.com/media/bookCover.jpg"
    }
  }
}
Note: this a simplified version of the actual data, if you want to see all the data, there are a couple of ways. One is described at the end of this page, another is to install the “React Developer Tools” extension for Chrome and inspect the “Redux” state tree. You will find the full structure on page -> datasets -> entity.
With this data, you can print out values and labels following the usual Value component flow. Here’s a brief example:
<h1><Value path="entity.title" /></h1>
<ul>
  <li><Value path="entity.metadata.brief_description.label" />: <Value path="entity.metadata.brief_description.value" /></li>
  <li><Value path="entity.metadata.country.label" />: <Value path="entity.metadata.country.value" /></li>
  <li><Value path="entity.metadata.date_of_publication.label" />: <Value path="entity.metadata.date_of_publication.value" /></li>
  <li><Value path="entity.metadata.cover_image.label" />: <Value path="entity.metadata.cover_image.value" /></li>
</ul>
This HTML code will print:
Name of a book
Brief Description: Something nice
Country: Ecuador
Date of Publication: 13 July, 1977
Image: yourdomain.com/media/bookCover.jpg
The metadata keys are the property names (sanitized to lower case and spaces replaced with underscores). Please note that you cannot directly use the Cover Image URL (value) to present an image instead of the URL text in the HTML of the page. To accomplish this, you need to use the EntityData component or, if you need more options, you would need to use the javascript area to assign the source of the image dynamically.
entityRaw and template datasets
The entity and entityRaw datasets have some values stored at the root level of the object, while most are stored inside the metadata object. Here is a brief example of what you can expect from the entityRaw dataset. Take the following entity structure:
| Properties | Values | Observations | | —————- | ———————————————— | ————————————————————– | | Title | Title of Entity | | | Country | India | Data based on a Thesaurus of countries | | Description | A rich text description | | | Related Entities | Title of another entity, Title of a third entity | Data based on two relationships selected in Relationship field |
Most properties will be inside the metadata object where the keys are the property names (sanitized to lower case and spaces replaced with underscores) and every value is actually an array of objects that have either value or label (or both keys, depending on their type). So, internally, the above entity will look like:
{
  _id: "89af7g8ad98ads"
  title: "Title of Entity"
  metadata: {
    country: [{ label: "India", key: "df9a88" }],
    description: [{ value: "A rich text description" }],
    related_entities: [
      { label: "Title of another entity", value: "9ad8f212" },
      { label: "Title of a third entity", value: "as182736a" },
    ]
  }
}
So, to expand on the previous explanation, the way to extract the data for properties other than title, is with something like this:
<Value path="entityRaw.metadata.country.0.value />
This will print the value India on the page’s HTML.
As noted, you could use the Repeat component to list both items that are stored in the “Related Entities” metadata property. Here is a more in depth example of how to create a more complex display of property name and property values (also using the template dataset):
<p><Value path="template.properties.2.label" />: </p>
<ul>
  <Repeat path="entityRaw.metadata.related_entities">
    <li>
      <Value path="label" />
    </li>
  </Repeat>
</ul>
This will print:
Related Entities:
Title of another entity
Title of a third entity
Notice that the position of the property in template (in this case “2”) needs to be hardcoded to the array. The order respects the order in which the properties are defined in the template. Still, you can inspect this by analyzing the correct array position within the template. There are several ways to accomplish this:
explore your datasets (described in the next section)
do a
repeatsection of all the properties and extract their labelsinspect the response to the browser request to the
templatesendpointinspect the redux store in
page -> datasets -> templatedoing an API call to fetch the template
inspecting the database directly
These are all advanced procedures. Please refer to the different sections of this documentation depending on your desired approach. As noted, whenever possible, use the EntityData component first, if this does not provide with enough versatility try the entity dataset as it has more data and it is simpler to use. If not, default to the entityRaw dataset. Only use the javascript section of a page if all else fails.
Exploring your datasets
You can check the specific Entity-related datasets in a page by following this procedure.
Create a new page with a title and the following contents:
<h1>My page's Datasets</h1>
<h3>Formatted entity data</h3>
<pre id="formatted-entity"></pre>
<hr />
<h3>Raw entity data</h3>
<pre id="raw-entity"></pre>
<hr />
<h3>Tamplate data</h3>
<pre id="template-data"></pre>
Add the following script to the page:
document.getElementById('formatted-entity').innerHTML = JSON.stringify(datasets.entity, null, 1);
document.getElementById('raw-entity').innerHTML = JSON.stringify(window.store.getState().page.datasets.toJS().entityRaw, null, 1);
document.getElementById('template-data').innerHTML = JSON.stringify(window.store.getState().page.datasets.toJS().template, null, 1);
Enable the page to be used as an entity view.
Assign the page to any template you would like for viewing it’s entities datasets.
Now, when you go to view any of the entities using that template, you will be able to see the Entity-specific datasets available.
Add a contact form to a page
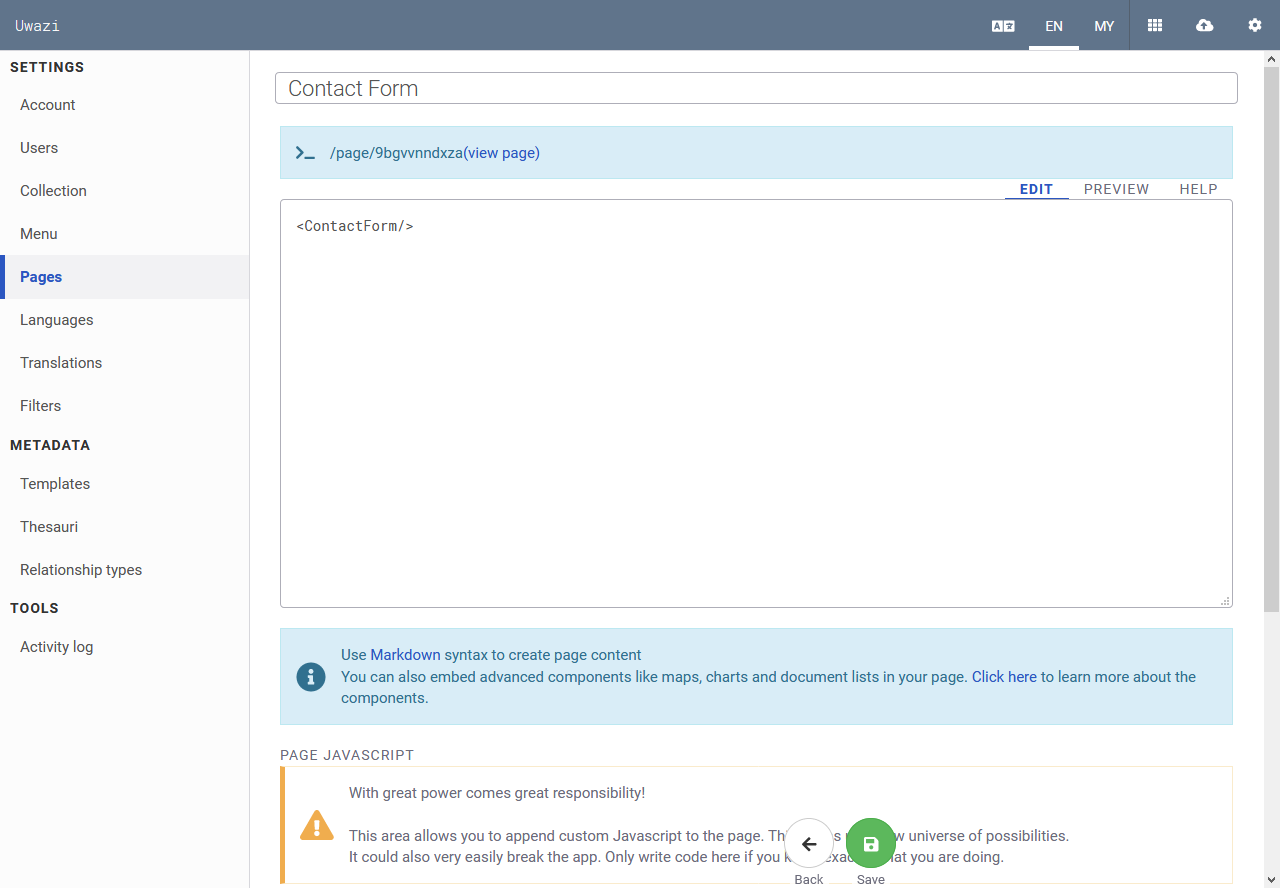
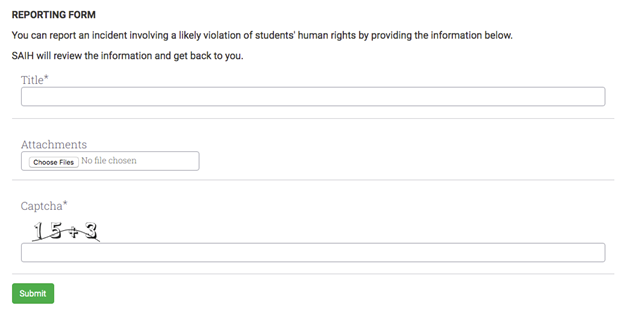
A Contact Form gives visitors an easy way to get in touch with you. You can quickly add a contact form to a page by including the code snippet <ContactForm/>.
You may add additional text in HTML around the contact form, if you wish.

Messages sent using the contact form will be delivered to the email address that is configured in your collection’s settings. Learn more about configuring forms.

Add a submission form to a page
An intake or submission form allows visitors to submit a form that creates an unpublished/private entity in your database.
Step 1: You need to define a template for this form in your instance.
Step 2: To any page, you can add this code snippet with the template ID (the numbers in your template URL): <PublicForm template="ID_OF_THE_TEMPLATE" />
Step 3 (optional):
A document is a PDF that gets shown in the main section of Uwazi when an entity is viewed. To add a document field to the form, add this line of code:
<PublicForm template="ID_OF_THE_TEMPLATE" file />Attachments are attached to an entity and available for download, but their contents are not visible in Uwazi. To add an attachment field, add this line of code:
<PublicForm template="ID_OF_THE_TEMPLATE" attachments />

In order for the form to sync into its corresponding template, you must also do the following:
Step 1: Go to Settings, and click on Collection.
Step 2: Add the template ID (the number in the template URL) under Allowed Public Templates.
In the case of multiple synced Uwazi instances (currently an experimental feature not available to all users), you can configure submissions from a public form on one Uwazi instance to create an unpublished entity in a different Uwazi instance. To accomplish this, do the following:
Step 1: Add the template ID under **Allowed Public Templates **(in Settings > Collection) for both instances.
Step 2: In the Uwazi instance that has the public intake form:
Add “remote” to the page’s code snippet, for example:
<PublicForm template="ID_OF_THE_TEMPLATE" remote />Go to Settings, and click on Collection, add the URL of the target Uwazi instance under Public Form Destination. (e.g. https://example.uwazi.io)
